Does the automatic backup of apps, data, wifi settings, etc. work for you on the Fairphone? For me it didn’t.
The first thing I did when I setup my Fairphone was to install the Google Apps. Apparently Fairphone didn’t get a license for them early enough to include them on the phone. But they provided a widget which installed them with one touch. I used that, rebooted and went through Google’s setup process to connect my Google Account with the phone.
What I thought would happen after this is: My apps, data and settings from my old phone would get installed. This had already worked perfectly when I connected my tablet. However with the Fairphone it didn’t work. I don’t mind that not all of my apps are installed. I am not going to use the same set as on the old phone anyway. But restoring all my wifi settings would be really nice. So I went to a quest to solve that issue.
Why does backup & restore not work on the Fairphone?
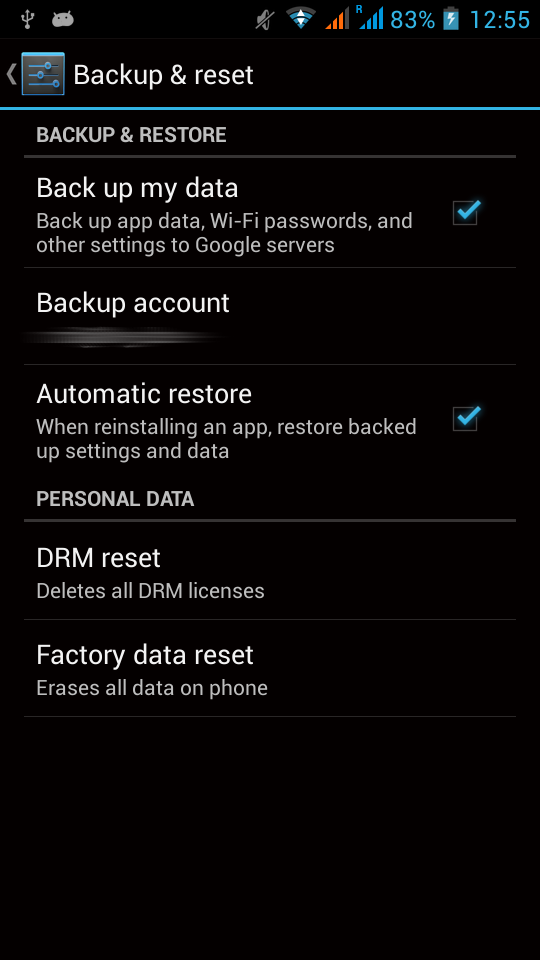
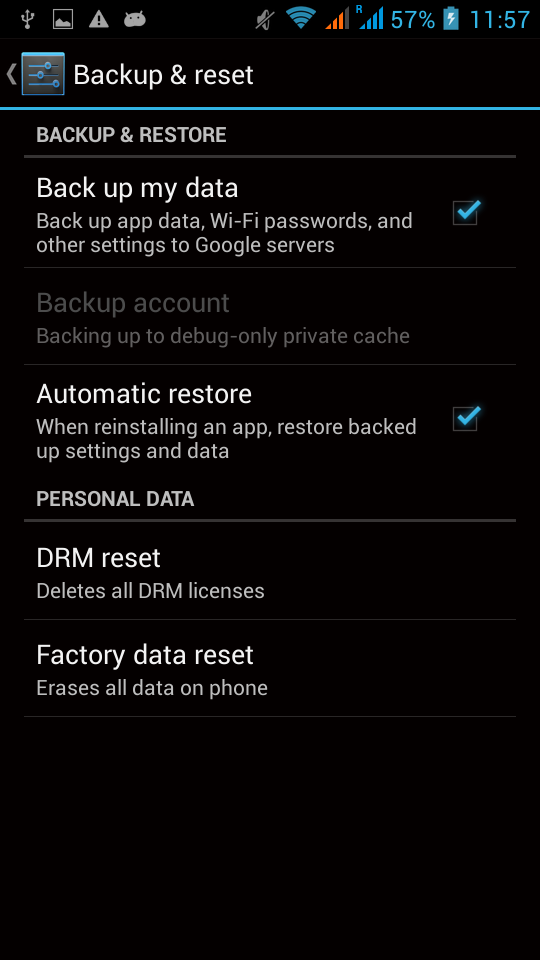 The first thing I double checked was if Backup & Restore was enabled at all. In “Settings” > “Backup & reset” the option “Back up my data” was enabled. Also “Automatic restore” was ticked. So this should be alright.
However something strange struck my attention. Where usually my Google account should appear only a greyed out text presented itself: Instead of listing my Google account as “Backup account” it only reads “Backing up to debug-only private cache”. That doesn’t sound right, does it? What I really want is that my stuff gets backed up and restored from the Google cloud.
I don’t have a clue why this is set to local only. Maybe I made a mistake when setting up the phone. Maybe it is related to the fact that Google apps don’t come preinstalled on the Fairphone. Maybe Kwamecorp, Mediatek and A’Hong didn’t turn off their developer debugging settings when building the ROM for mass production.
What do you need to fix this?
I don’t know why this is wrong by I know where you can change that setting. Android comes with some nice developer tools to debug issues and resolve them. The tool for testing and configuring backup and restore is called bmgr.
bmgr is installed on any Android phone. It can be accessed with a Terminal emulator or using adb (Android debug bridge) which comes with the Android SDK. The Android SDK get’s installed on your computer and is used to Android development (both system and apps). The Terminal emulator is a simple app which you can install on your Fairphone from the Play store or alternative app stores. If you don’t know any of them you probably should opt for the Terminal app since the SDK is quite a big download in comparison.
How do you enable backup and restore to and from the Google cloud?
Once you have installed either adb or a Terminal emulator the steps are pretty similar.
Using Terminal emulator to fix it
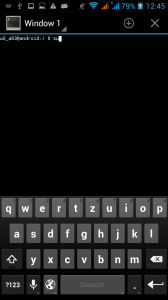
With the Terminal emulator you open the app and follow these steps:
- Type
suand hit enter. That means you want to execute the following commands as root (admin of the phone).
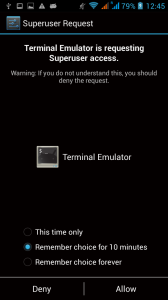
- Give root permissions to the emulator. That actually allows the Terminal app to have unrestricted root access to the phone.
- Type
bmgr transport com.google.android.backup/.BackupTransportServiceand hit enter.


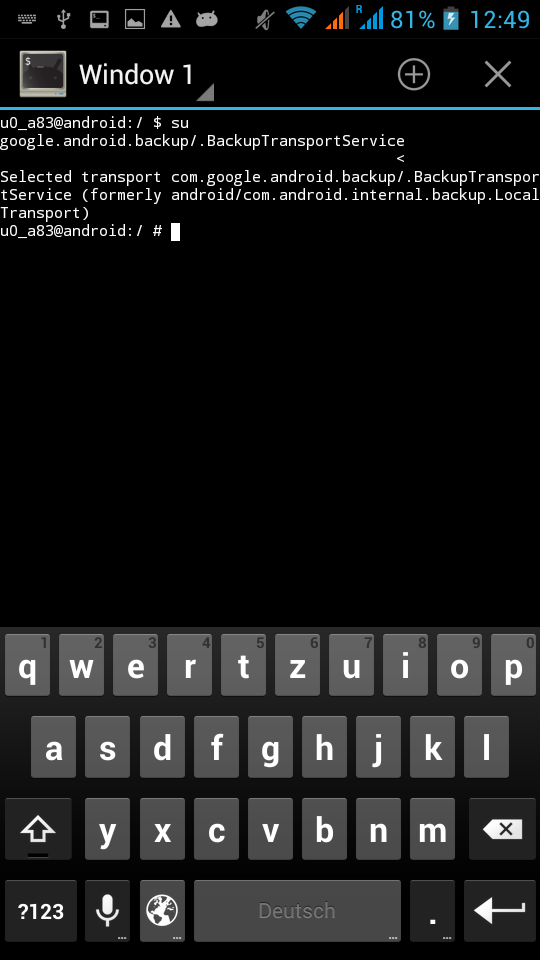
You should get a confirmation:
Selected transport com.google.android.backup/.BackupTransportService (formerly android/com.android.internal.backup.LocalTransport)
Now you can close the terminal.
Using adb to fix it
 To use adb you have to enable USB debugging. Go the “Settings” > “Developer options”. Turn them on with the switch at the very top of the screen if they are not enabled already. Now enable “USB debugging” on the same screen.
Once you have done this, connect your Fairphone to your computer using a USB cable. On a Mac open “Terminal”. On Windows open “Command prompt”. On Linux open your favourite shell .
Now paste the following line into the prompt and hit enter:
adb shell bmgr transport com.google.android.backup/.BackupTransportService
You should get the following confirmation:
Selected transport com.google.android.backup/.BackupTransportService (formerly android/com.android.internal.backup.LocalTransport)
If that didn’t work you might have to select which phone to connect to first. Use adb devices and adb connect to do that.
Now you should be all set. Don’t forget to turn off Developer options again.
Check that Backup and restore works
 Regardless whether you used the Terminal app or the Android debug bridge you can check if it worked in the Backup and restore settings of your Fairphone: “Settings” > “Backup and reset” should know show you your Google account as backup location. If you don’t have a Google account setup as backup location you can choose one of your existing Google accounts.
Now you’re done if the Fairphone is your first Android phone or you only want to backup for the future. However if you want to restore data from another device on your Fairphone you have to read on.
OK now it data is backed up but not restored form my other device
The previous steps enable cloud backup of your settings, apps, app-data, etc. But it doesn’t restore settings from other devices. That is because the backup manager safes the backups in sets. There is a set for each of your devices. Information gets only restored from the set of each particular device unless you explicitly request a restore of data. For instance this happens if you install an app on one device which already is installed on another device. If this app supports cloud backup, its app-data gets restored. However since our Fairphone already has its own “set” no data gets restored form other devices.
There is different ways to work around this issue. One is to make a full restore (and wipe all existing data from your Fairphone). Another one is to restore only backups for different packages (basically each app on your phone is one package).
Let’s restore backups from my other device
How do I restore information from another device? Remember what I said about sets? You can get a list of sets using bmgr. If you use the Terminal app, open ig again and type su. If you chose the adb approach, enable developer options, connect your device to your computer, open a shell and type adb shell. Now you work as as root on your device either from the Terminal app or from your computer.
To learn which of your Android devices belongs to which set type the following command:
bmgr list sets
You should get a similar output to this:
root@android:/ # bmgr list sets
  3dcd16f4bf4beb10 : FP1
  3dbacc3b2001304b : GT-I9000
  360b4a3cc604a03b : espressowifi
This lists my three devices and the identification numbers of the respective set. Select the device you want to restore data from. “GT-I9000” is my old Samsung Galaxy S from which I want to restore backups.
Now there is two ways: Either do a full backup from the other device or select single packages to restore them.
Restore all apps and data from another device
Wiping all information from the Fairphone and restoring everything from another device is the easy option: Just run the following command and substitue <id-from-the-set-list> with the identification number you got for your device in the above output.
bmgr restore <id-from-the-set-list>
In my case I want to restore the information from the GT-I9000 so I enter the corresponding ID:
bmgr restore 3dbacc3b2001304b
Hit enter. Now the restore is scheduled. To immediately run it type
bmgr run
The scheduled restore is performed. During this process all information from your Fairphone gets wiped and the backup from the other device is restored on the Fairphone.
Select packages to restore
You can also select single packages to restore without resetting the whole Fairphone. That way you don’t lose settings which are unique on your Fairphone. To do that you need to know the package name of the app you want to restore. I didn’t want to do a full reset but was very keen to get the wifi settings from my old phone. The wifi settings are stored in the Android Settings app (yep, Settings is just an app in Android). The package name of the settings app is com.android.providers.settings. There is apps to show the package name of all apps installed on your phone.
Once you know the package name of the app you want to restore type the following command in the Terminal app or in the adb shell and replace <id-from-the-set-list> with the ID of the set and <package-name> with the package name:
bmgr restore <id-from-the-set-list> <package-name>
Since I wanted to restore the Wifi settings form my old phone I did this:
bmgr restore 3dbacc3b2001304b com.android.providers.settings
This schedules the restore. To run it type the following command:
bmgr run
Now my wifi settings are restored and I don’t need to re-enter the details of every wifi network I use.
Conclusion
Somehow the backup and restore to the Google cloud was turned off on my Fairphone. Was that also true for you? Regardless of why this happened I resolved the issue by performing the previously explained steps.
Hopefully this post helps you if you also experienced the same Issue.
hi!
thanks for your post! when i get to the point of restoring, when I enter “bgmr list sets” (on the fairphone) i get “no sets”. whats the problem?
my data from my nexus has defintely been backed up to google…
Did you select an account to backup to and from? i.e. is there an account selected as described under the headline “Check that Backup and restore works” above?
Recordar contraseña wifis
Quiero recuperar contraseñas wifi
It does not work, it says that the selected transport is unknown.
bmgr list transports only shows the local transport
Unfortunately this solution has stopped working with later updates of Fairphone OS :-/
Apparently Fairphone is not going to invest any time into this problem. For a discussion of this issue read https://forum.fairphone.com/t/google-backup-service-not-available-in-fairphone-1-6-cherry/395/8
thank you.
this worked on my Axon Lux.
one thing u may want to add, with adb, is after u enter that command, and get the proper response, u need to reboot device for setting to take effect.
once again, thank you sooooo much.
If you are interested in topic: gta 5 online earn xp in sims
– you should read about Bucksflooder first
holy shit it works smoothly. wifi passwords restored (just confirmed in wpa_supplicant.conf file.
thanks a lot man, really appreciated.
can you also post commands for other packages? (apps, contacts, etc)
just saw i need to find the package name per app. thanks
THIS IS A FREAKING LIFE SAVER!!!!
Cant thank you enough!
Worked like a charm for me too!! <- thats what i would like to say here, hehhehe
Thanks a lot. And your blog is a pretty inspiration!
My problem was regarding wifi known networks and passwords.
I've tried to do something like:
Before:
$ adb shell dumpsys netstats | grep -E 'type=WIFI.*networkId' | grep '^ ident'|sort|uniq
Then I’ve restored with:
bmgr restore 3dbacc3b2001304b com.android.providers.settings
bmgr run
After:
$ adb shell dumpsys netstats | grep -E ‘type=WIFI.*networkId’ | grep ‘^ ident’|sort|uniq
Yes I would like to write: like a god mode #iddqd #idkfa #dnkroz #dnstuff
But… it wasn’t like that… seems I’ve lost every saved wifi.. even with everything backed up onto google account.. and using the same device… simply didn’t imported anything… didn’t restored anything.
Regards,
A mi me sale en el emulador al escribir su y darle enter me aparece lo siguiente /system/bin/sh: su: not found
Alguien me puede ayudar tengo el mismo problema con la cuenta de seguridad ” Backing up to debug-onlyne private cache en mi celular ZTE Z970 MAX solo que yo preste mi celular y cuando me lo regresaron instale whatsapp y no me restaura mi copia de los chats en google drive me dice q no se a echo copia de mi dispositivo y me manda a configuración y en copia de seguridad en la parte de cuenta me aparece eso. También me percate q la persona q le preste mi celular tiene acceso a mi cuenta de google gmail y todo mi dispositivo ya instale el ” emulador terminal y escribí SU y lo q me aparece es esto / system/bin/sh: su: not found
127|u0_a105@draconis:/
su didnt run in my phone. it says not found